Before you enable Service Center for a company, you must first make sure that the company data tables have been created.
New Installation - If this is a new Service Center implementation, then you must first select Company Maintenance from the Library Master Main menu then click the Activate button. In that list you will find ASI Service Center. Check the box associated with that entry to create the data tables.
Migration from earlier version - If you are migrating data from a version earlier than 5.00, your data files will be copied to the new installation during the migration process. Do not attempt to enable ASI Service Center using the ASI Additions Control Panel until after the data conversion is complete.
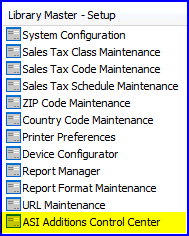
In order to unlock your ASI Addition, a new option is added to the Library Master Setup menu.

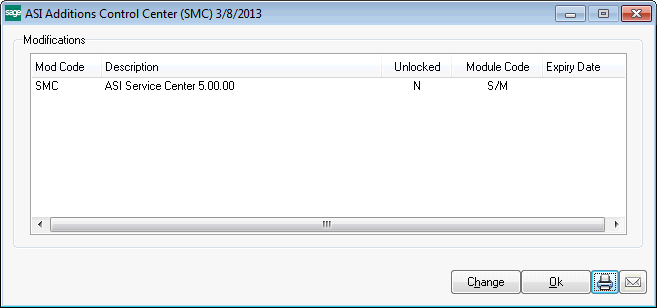
Before you can use ASI Service Center for a company, you will need to select ASI Additions Control Center from the setup menu. This program will list all the ASI Additions you have installed on your Sage 100 ERP system.

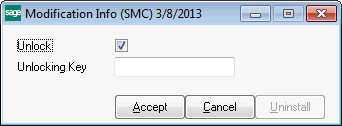
Select the one you wish to turn on or turn off and click the Change button at the bottom of the screen. A screen similar to the following will pop up.

Check the Unlock box to turn the modification on. If you have an unlocking key, you can enter it now. If you do not have an unlocking key, you can accept it anyway and the ASI Addition can be used for thirty days (some ASI Additions do not allow a demo period).
In order to get an unlocking key from ASI, accept the Modification Info then click either the printer icon or the email icon at the bottom right of the ASI Additions Control Center window. This will compile all the information needed to generate an unlocking key. Send the email or printed sheet to ASI and an unlocking key will be sent back.
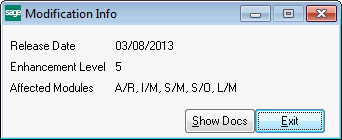
If you double-click on the mod code line in the ASI Additions Control Center, a box will pop up showing more information about the ASI Addition you selected.

You might want to read about Migrating from Earlier Versions.