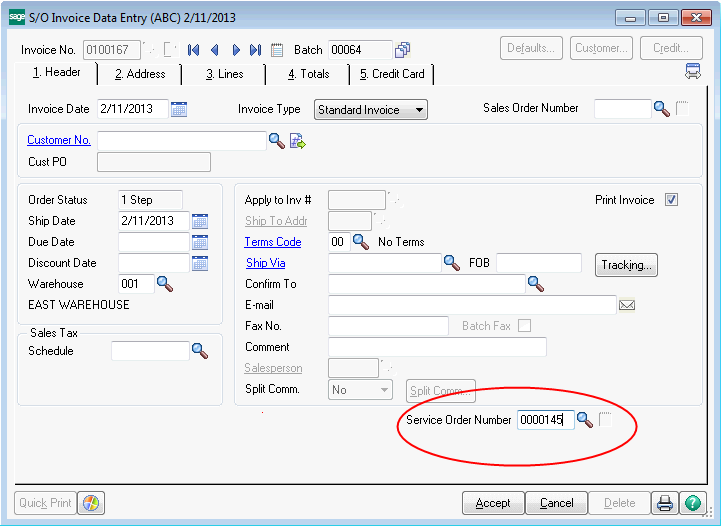
A new field has been added to the Invoice Data Entry header. Rather than entering a sales order number to invoice, you can enter a Service Order Number. You can also use the lookup button or F2 to show a list of service orders. The field has been placed at the bottom of the panel to avoid rearranging so many standard fields. You can use Custom Office to move the field wherever you prefer it to be.
Note - In order for a service order to be invoiced at least one of the service item entries must have a status that indicates it is ready to update and create an invoice. For more information about status codes take a look at Service Order Status Maintenance.
Once you enter or select a service order, the program will review all the service item entries looking for those that are ready to bill. If some service item entries will create credit memos (Credit Return and Exchange) and some will create invoices (Standard and Refurbish), the following message will appear.

The sample order, 0000145, has both credit return and standard service item entries, so it gives a choice to click Yes to create an invoice from the Refurbish and Standard service item entries or click No to create a credit memo for the Credit Return and Exchange service item entries.
Credit Memo - If you click No, the Invoice Type is changed to Credit Memo. Once you fill out the header fields as desired and click on the Lines panel, the program will prompt for which service item entries you wish to invoice.
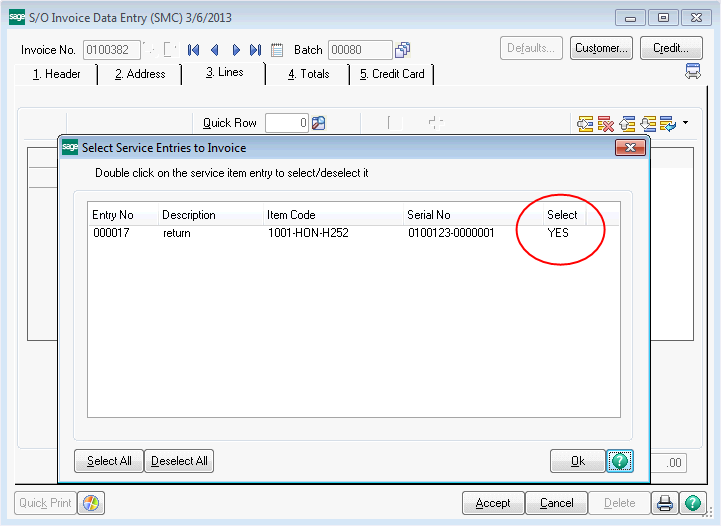
You must select which of the service item entries you wish to invoice. Double click on a row to change the Select column to YES or NO. The Select All button on the lower left will automatically set them all to YES while the Deselect All button will set all the rows to NO.
Once you have selected all the service item entries you wish to ship, click OK and all the associated lines from the service order will be copied to the invoice. Note that the item being returned is shown on the first line. If you set the New Item Code and New Serial Number when you entered the service item entry, you will not see the original item code for the service item, but the new item code. The New Item Code and New Serial Number will be put back into inventory. For more information see Service Item Entry Columns.
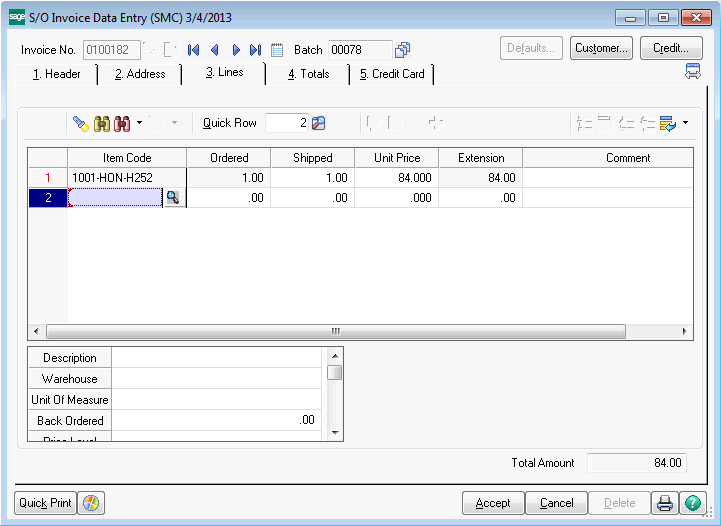
Invoice - Click Yes to create an invoice from the Refurbish and Standard Service Item entries. Once you've done that, the Invoice Type is set to Invoice (rather than Credit Memo) and you can proceed to edit any of the header fields you wish to change. Once you click on the Lines panel, the dialog will pop up asking you to select the service item entries to invoice.
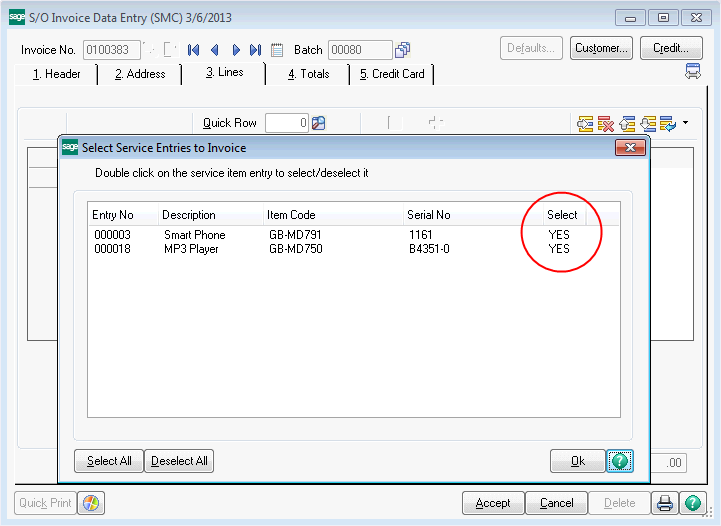
You must select which of the service item entries you wish to invoice. Double click on a row to change the Select column to YES or NO. The Select All button on the lower left will automatically set them all to YES while the Deselect All button will set all the rows to NO.
Once you have selected all the service item entries you wish to invoice, click OK and all the associated lines from the service order will be copied to the invoice lines. Note that there is a comment line at the top that represents the actual service item.
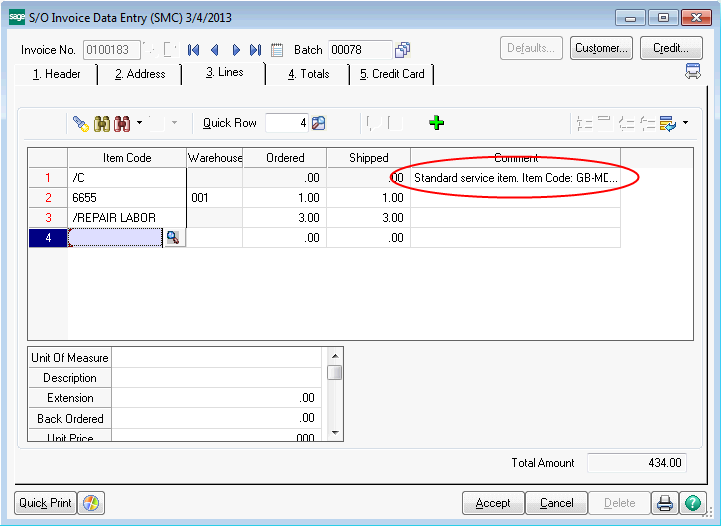
Once the lines are copied to the invoice, you can proceed as you normally would to ship the items.
Add Lines ![]() - If you have copied in one service item and then decide that you can ship a second or more service items, click the Add Lines button and select additional service items entries just the way you did before.
- If you have copied in one service item and then decide that you can ship a second or more service items, click the Add Lines button and select additional service items entries just the way you did before.
Cancel or Delete - If you cancel a shipment record before it is saved, or if you delete an existing shipper that came from a service order, the service order status is changed to the Status To Use if Invoice Deleted from the Service Center Option Main panel.