***If you wish to test this ASI Service Center and do not intend to use it in your live system, do not install it on your production MAS 90 or MAS 200 system. It is better to create a test environment for this purpose.***
This modification is delivered in one executable file, SMC440Setup.EXE for installation on your MAS90/MAS200® system.
Installation:
| 1. | Version - Make sure your MAS90/MAS200 version is 4.40. |
| 2. | Backup - Get a good backup of MAS90/MAS200 data and programs before proceeding. |
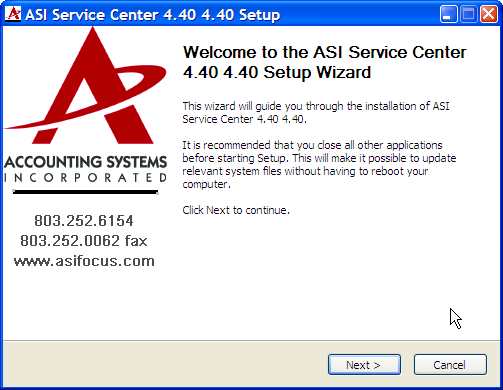
| 3. | Start Install - Exit MAS90/MAS200, then execute the install file, SMC440Setup.EXE, by double-clicking or right-clicking and selecting “Open.” You will see a panel similar the one below.

Check to be sure that you are install the correct modification, and the version number shown matches the version of you MAS90/MAS200® software |
| 4. | Installation – When you press the Next button, the following screen will display, allowing you to select the MAS90 folder where you are installing this modification. This folder should be on your server, not on your local drive.

When have entered a valid Destination Folder, the Install button will be enabled. When you click it the installation will proceed with no further prompts. |
| 5. | Start MAS90/MAS200® – Start up MAS90® or MAS200® in the normal fashion. You will see a dialog reporting progress as the changes are incorporated into the MAS90/MAS200® system. |
| 6. | Role Maintenance – Since new options are being added to the menus, you will need to visit Role Maintenance on the Library Master Main menu and give rights to those tasks to the appropriate people. |

