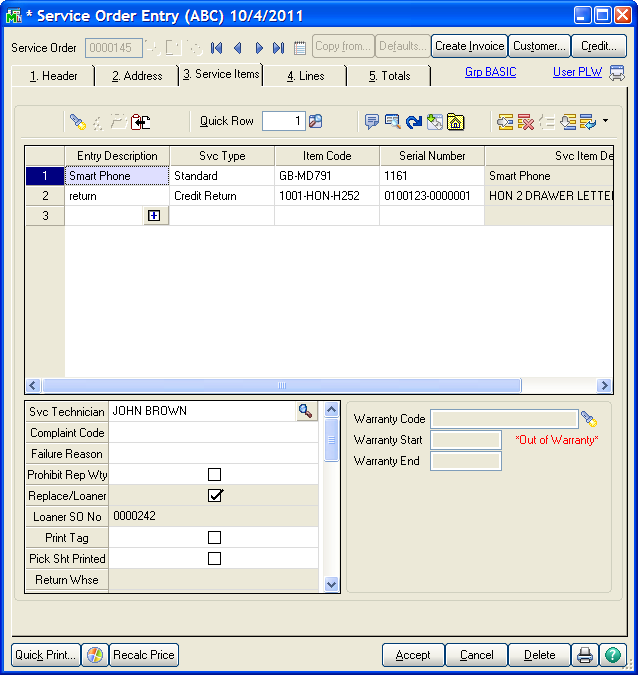
A unique feature of the ASI Service Center service order is that you can list the units, or service items, you are repairing, and can enter the separate charges for each of these units. Each service item that you list on the Service Items tab of the service order is a Service Item Entry. Above you can see what a service item entry screen looks like. There is a primary grid, at the top, which has a row for each unit that is being repaired, refurbished or returned. As each row is highlighted, the secondary grid, just below the primary, will show additional fields that related to that service item entry.
Each user can move fields from the primary to the secondary grid, or vice versa, and change the order of the fields, to suit unique needs. A new service item entry is added by entering a new Entry Description.
Entry Description - The Entry Description is a free-form field that labels a new service item entry. You can put whatever text you wish here, include spaces, to indicate that you are adding a new service item entry to the grid. Alternatively, you can click the plus sign or press F2 to automatically add a number to the Entry Description field and this start a new service item entry.
Grid Buttons - Just above the primary grid are a row of buttons, or icons, that can be used to do various tasks related to creating new service item entries, getting additional information about the highlighted service item entry, or performing some other task related to the service item entries on the panel. For more information about the grid buttons, take a look at Service Item Entry Grid Buttons.