|
Creating an ODBC Data Source Name |
  
|
|
Creating an ODBC Data Source Name |
|
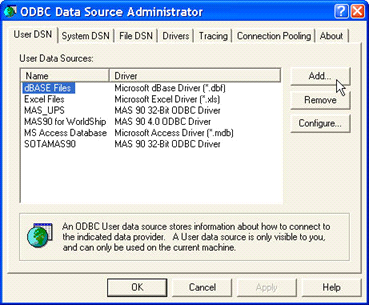
The ODBC Administrator is a standard Windows tool to create and edit DSNs. You can also get to this tool from the Administrative Tools folder of the Control Panel.
Click the Add button to create a new DSN. The DSN you are about to create is very similar to the SOTAMAS90 DSN that you will probably see in the list if Sage 100 ERP has already been installed on this workstation.
NOTE: If Sage 100 ERP has not been installed, you will need to run workstation setup to make sure you have the appropriate Sage ODBC drivers available.

Select the “MAS 90 4.0 ODBC Driver” from the driver list. If you do not see this driver, then you will probably need to run Sage 100 ERP WorkStation setup. Click the Finish button to continue.

The ProvideX ODBC Driver Setup will display a screen with several panels that you need to fill in. The first panel, or tab, displayed is Basic.
Data Source Name – We assigned a name MASUPS, but you can create any unused name that you wish. This is the name that will show up in WorldShip when you are asked to select a DSN.
Description – Enter a meaningful description.
Database Directory – This is important. Enter the folder where your Sage 100 ERP data resides, followed by UPSDicts. It is best if you use a URL address. If you choose to use a drive letter, make sure that the drive letter will be mapped the next time you start up this workstation.
Definition File – Leave this field blank.
Once you have filled in the three important fields, click on the Logon tab.
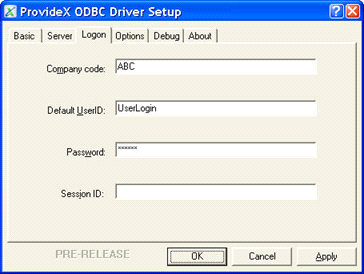
You must enter the information necessary for the user to log on to Sage 100 ERP and gain access to the Sales Order header file. It is recommended that you create a specific Sage 100 ERP user for this purpose and give that user very limited rights to the Sage 100 ERP system. The only table that needs to be read is SO_SalesOrderHeader. You will need to specify the company code, the default user ID, and the password. You can ignore the Session ID.
Once you have filled in the information, click on the Options tab to continue.
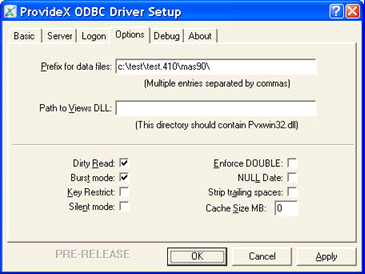
The import piece of information on this tab is the Prefix for data files. You must enter the exact path to the folder where Sage 100 ERP is installed. This is not the same path that you entered on the Basic tab. This path does not have UPSDicts on the end of it.
You can also click Dirty Read and Burst Mode since these options can improve performance. These are not required, however.
Once you have filled in this tab, click OK to save the new DSN and return to the ODBC Data Source Administrator screen. You can then click OK there and return to WorldShip.